Table of Contents
Introduction
Illustrator’s Variables in Adobe Illustrator offer a powerful way to streamline design workflows, especially for projects with repetitive elements or variable data. Whether you’re creating personalized invitations, data-driven infographics, or dynamic packaging designs, mastering variables can significantly enhance your efficiency and productivity. In this step-by-step guide, we’ll explore how to harness the full potential of variables in Illustrator.
Understanding Illustrator’s Variables
Before diving into creating variables, it’s essential to understand their purpose and functionality. Variables allow you to link elements in your Illustrator document to external data sources, such as CSV files. These elements can include text, images, or entire objects. By defining variables, you can create dynamic designs that automatically update based on changes in the linked data.
Streamline design Creation Using Illustrator: A Step-by-Step Guide
Step 1: Design Your Template
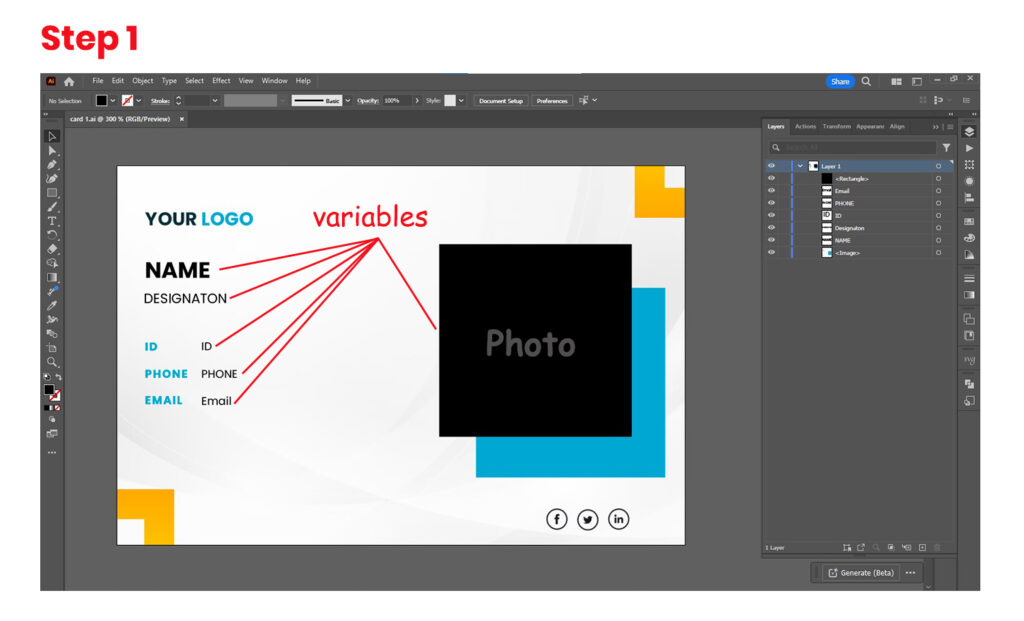
To begin, create a blank Illustrator document with your card’s dimensions and design in it. Design the card template, leaving placeholders for the variable content such as the recipient’s name, mobile number, and photo. Ensure that these placeholders are positioned appropriately within the design.
The images that you make in illustrator must match the dimensions of the images that you use to replace the variable. Put them in the same folder as the illustrator file you have.
Step 2: Make Data Source
To create a data source, follow the steps below :
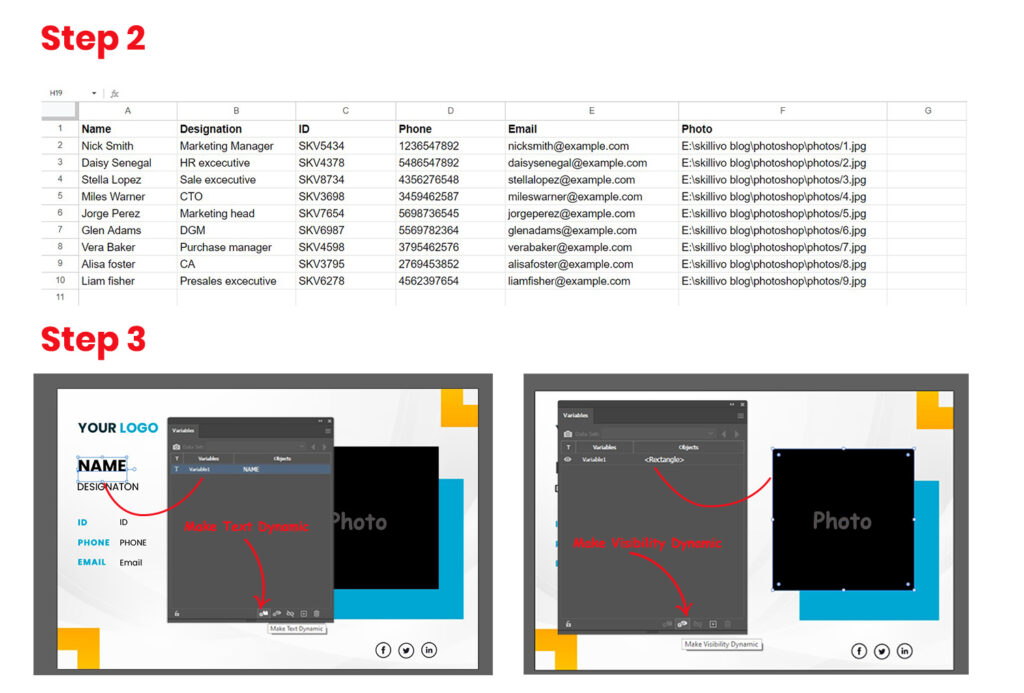
Make a.CSV (Comma-Separated Values) file for the data source using Excel.
What is .CSV
CSV files, or comma-separated values, are frequently used to organise and transfer data between various programmes. Excel is a great application for producing CSV files because of its easy-to-use user interface and strong data management features.
Open Microsoft Excel
Start by opening Microsoft Excel on your PC. If you don’t have Excel installed, you can use alternative spreadsheet software that supports CSV file creation
Enter Your Data
In the Excel worksheet, enter the data you want to include in your CSV file eg. Recipient’s name, Mobile Number and for image write correct path of that image in every cell. Be careful not to include commas while entering data.
- Precede the data field name with an “@” symbol to denote text or paths referring to image files. Note that the “@” symbol is necessary only in the first line; subsequent lines should contain the image paths directly.
- Use a “%” symbol at the beginning of the data field name for graphs, and a “#” symbol for visibility.
- To define the visibility of an object, indicate “true” or “false” for each data field accordingly.
Save As CSV Format
- Click on the “File” menu in the top-left corner of the Excel window.
- Select “Save As” from the dropdown menu.
- Choose the location where you want to save the file.
- In the “Save as type” dropdown menu, select “CSV (Comma delimited) (*.csv)”.
- Enter a name for your CSV file in the “File name” field.
- Click the “Save” button to save the file.
Step 3: Define Illustrator’s Variables for Text and Images in Illustrator
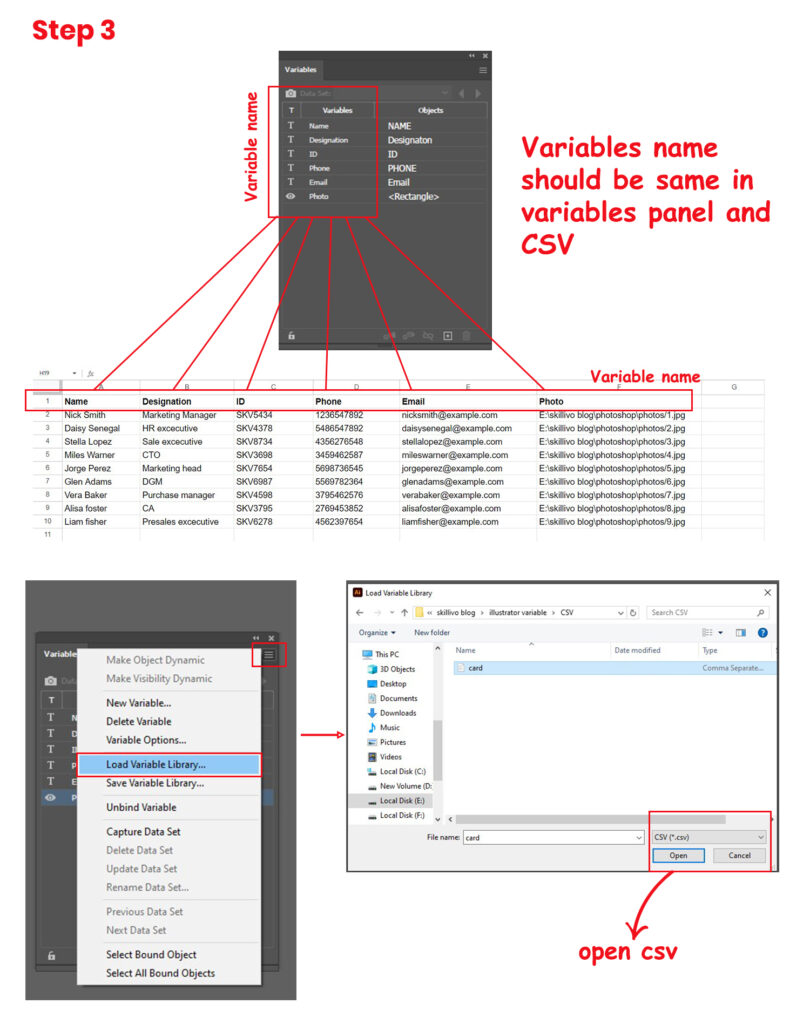
Navigate to the “Window” menu in Illustrator and select “Variables.”
- Choose the text layer you want to make dynamic and click on the “Make Text Dynamic” option in the variable dialog box. Repeat this process for any other layers you wish to make dynamic.
- You will now see two columns in the “Variables” box. One column lists the variable names, and the other column displays the corresponding variable values.
- Click on the three-line icon at the top right corner of the “Variables” panel.
- Select the “Load Variable Library” option and choose the .CSV file containing your data. Click “Open.”
- Ensure that each variable in Illustrator has the same name as the corresponding Excel column heading. For example, if your first variable is named “variable1,” then one of the Excel column headings should also be “variable1.”
Step 4: Export Data Sets in PDF
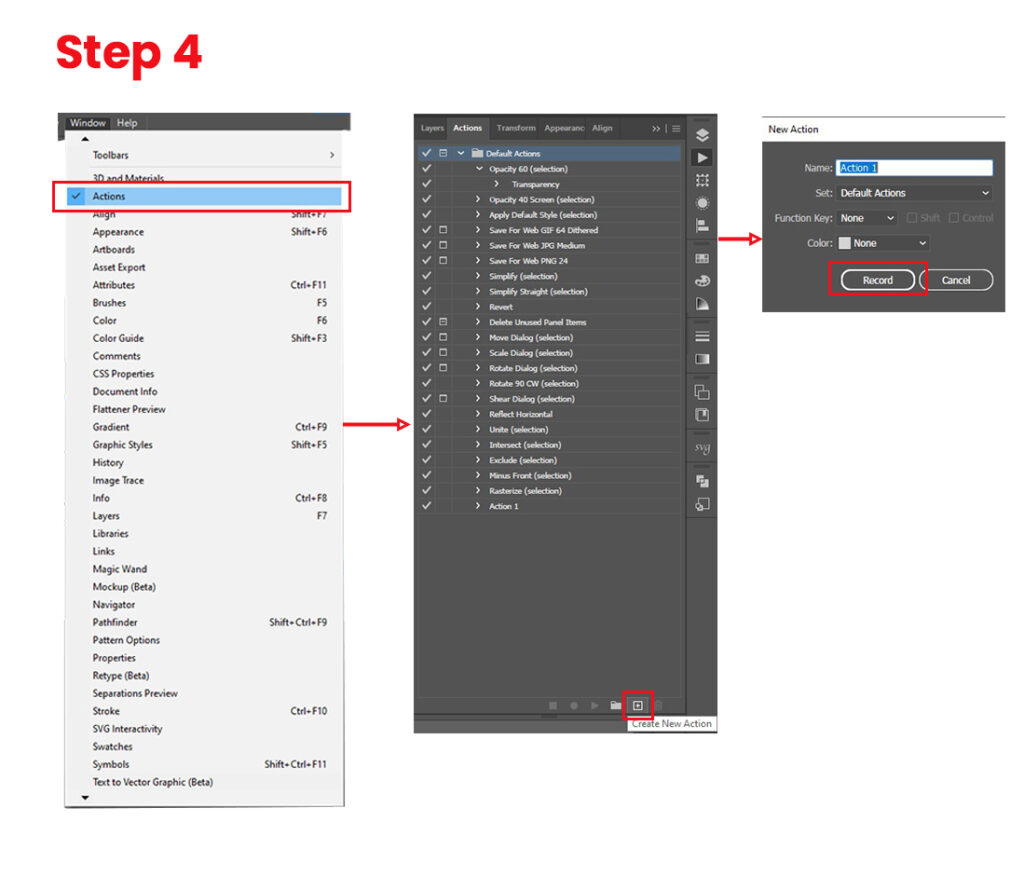
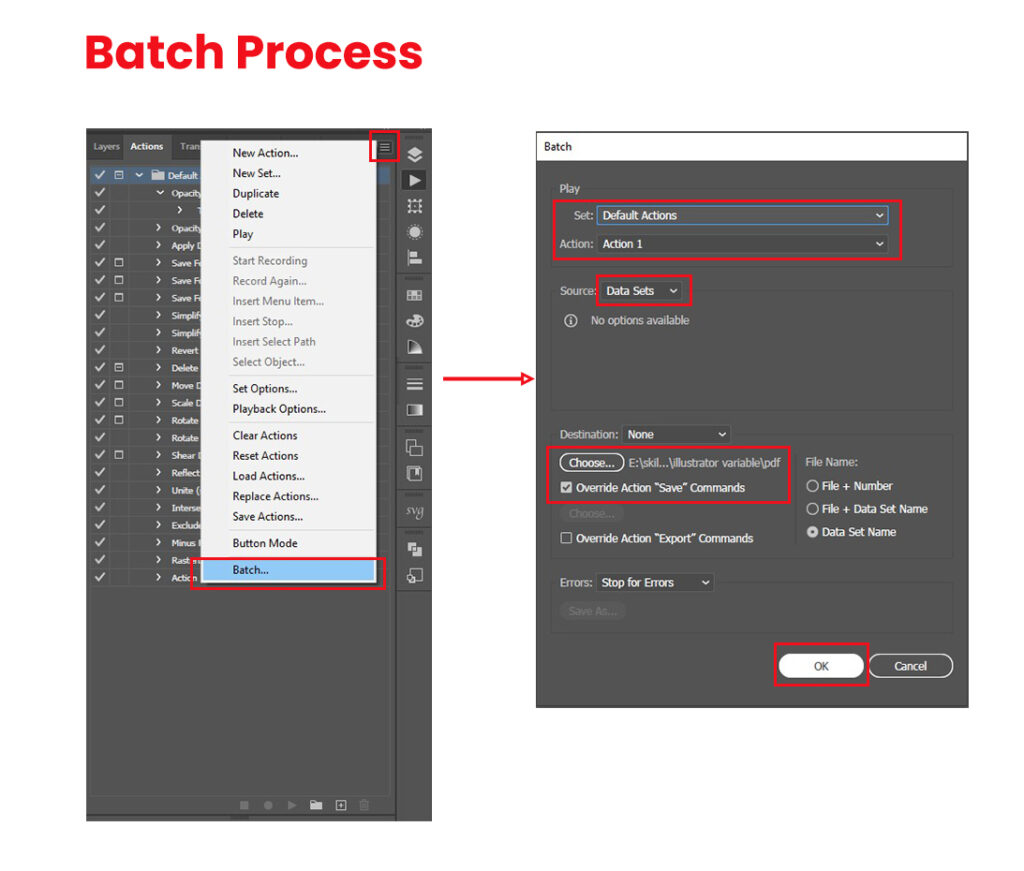
To export each record, we will utilize an Illustrator action within a batch process.
- Name a new action as ‘Save Data Set as PDF’.
- Navigate to File > Save a Copy…
- Ensure not to modify the file name.
- Select PDF as the file format.
- Adjust PDF settings according to your preferences.
- Verify that ‘View PDF after saving’ is enabled.
- Click ‘Save PDF’.
- Stop recording the action.
Now, let’s execute the batch process to apply this action to our data sets.
- Click on the three-line icon at the top right corner of the “Actions” panel
- In the ‘Source’ dropdown, choose ‘Data Sets’.
- enable override Action “save” commands and choose For the ‘Destination’, select a desired location.
- choose ‘Data Set Name’ for the ‘File Name’, ensuring uniqueness among your data sets.
- Finally, select an error reporting option and click ‘OK’.
Interested in learning about variables in Photoshop? – Unlock the Power of Photoshop: Easily Automate 100s of Personalized Designs with Variables
